 The 3-Link information for a Mk3.1 complete kit is limited, the following information is a result of the FFR manual, build school, and cobra forum threads, it includes lessons learned as I installed a Moser 8.8 rear axle into a 3-Link suspension system. The Moser axle already has the upper arm mount pre-welded to the axle.
Note: It is OK to install the caliper brackets prior to installing the axle but DO NOT install the calipers or disk as you will not be able to pass the axle through the panhard frame mount. Don’t worry about clearance, once assembled the axle will not rest on the panhard chassis mount.
 1. Install panhard bar and competition traction-lok brakets to axle (pre-paint axle prior to assembly, brackets are powder coated)
2. Place axle on jack stands or use a jack to place axle in the approximate position and install lower control arms. To keep mounting ears parallel you may need to add fender washers between LCA and mounting ears (top picture), at this stage tighten, but do not torque. User upper holes for less than 400hp
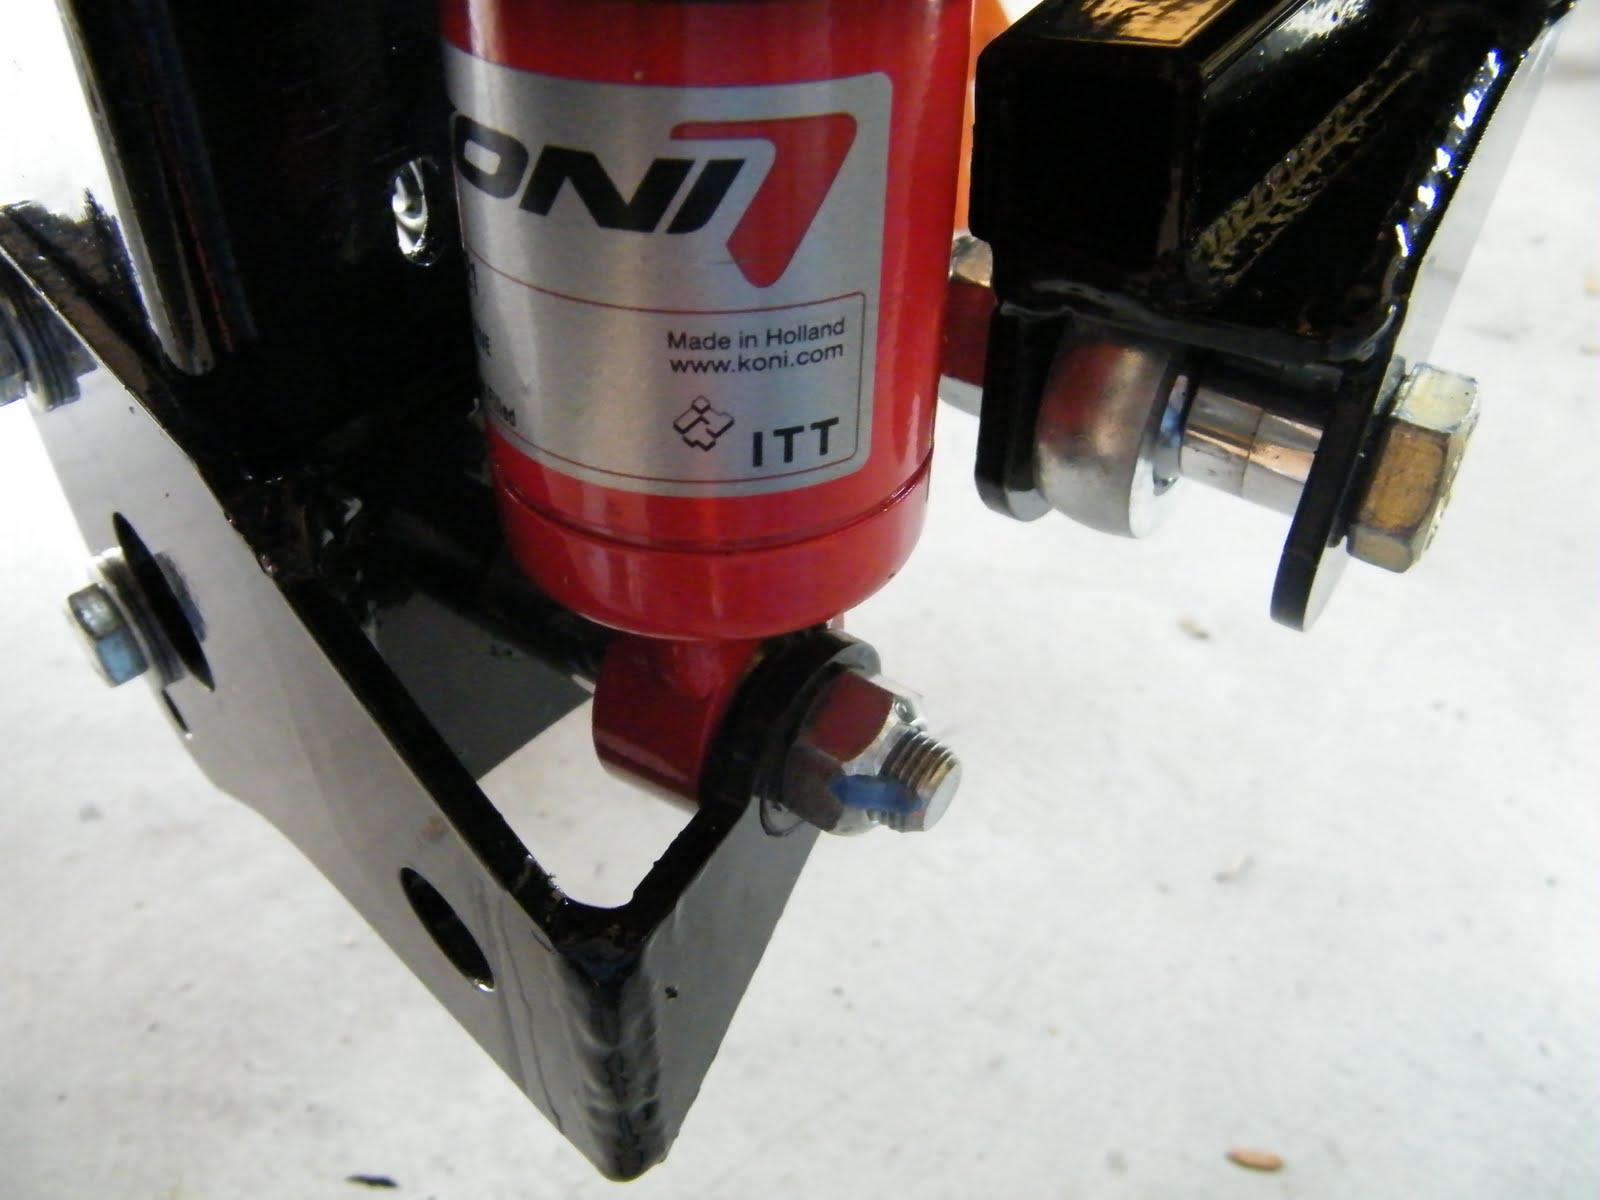
3. Assemble Koni shocks; install shocks with body at the bottom, shaft up. Use equal 1.1” spacers for the upper mount. For the lower mount use the larger 1.1” spacer at the front and the 1/8” shim at the rear (2nd picture). Install the lower shock bolt from front to back.
 4. Assemble the panhard bar and install to the passenger side traction-lok bracket using the following spacers. User two 0.375” spacers and one 0.25” spacer towards the front with the 0.0625” shim to the rear. Use the 5/8” washers with the bolt and nut.(2nd picture)
5. Install the panhard bar to the frame with the remaining two 0.375” spacers to the rear and no shim at the front. Check that the rod end does not binding on the weld. (3rd picture)
 6. Install upper control arm with equal 0.25” spacers, for cars with less than 400hp user upper frame mounting holes. Use 5/8” washer at axle bracket.
7. Torque all bolts, check shock does not bind.
Upper control will be used to set pinion angle, panhard bar will be used to center axle.
Final note: Be careful with shock bolts and spacers, I had very soft spacers and with a torque setting of 50 ft/lb’s the spacer compressed.

Fraser - this pic really helps. Would ypu have a pic showing the other side ? I am struggling with connecting the traction lock brackets in terms of which holes line up with which on the Moser .....thanks....
ReplyDelete